EDM for Sage X3
Installation
Pre-requisites
Licensing
Install the Server Components
Install the Client Components
Install Add-On Components
Hotfixes
Implementation
Implement EDD
Implement EDM
Implement PIA with DbCapture
Implement PIA with SmartExtract
Administration
Logs
Vault
Styling
Translations
Web-Services
Upgrade
Upgrade Server Components
Upgrade Client Components
Enhancements
Request an Enhancement
Usage
How to use EDD
How to use EDM
How to use DbCapture
How to use SmartExtract
Troubleshooting
EDD
EDM
PIA
How to Use SmartExtract
Assumptions
The Purchase Invoice Automation solution is implemented.
Information
New for R14, PIA for Sage X3 using SmartExtract is V1's latest fully web based, AI powered OCR solution for Invoice processing. It provides the following functionality:
• Purchase Invoices / Credit (GESPIH)
• Create a Purchase Invoice in Sage X3 by matching against singular or multiple Purchase Order / Receipt Numbers
• Create a Purchase Invoice in Sage X3 without a Purchase Order or Receipt number (called a ‘direct’ or ‘miscellaneous’ Invoice) allowing lines to be coded
• Supplier AP Invoices / Credit (GESBIS)
• Create a Supplier AP Invoice in Sage X3 using Account Structures
This page will grow over time and has short snappy guides on how to perform the basic day to day tasks when processing documents in SmartExtract.
To find something on this page, start typing below, where one is found, select your topic and click Submit to snap to it.
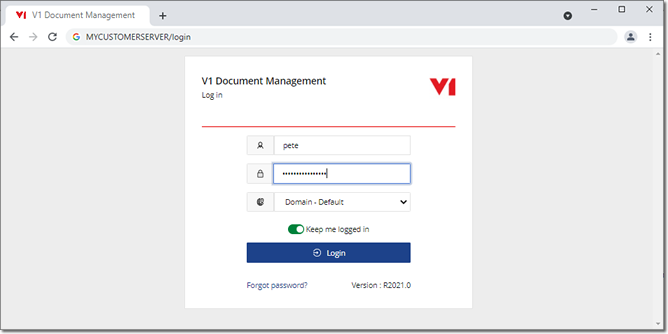
Login to the V1SmartSuite
The V1SmartSuite is the generic term for the suite of products from V1. Using the URL provided to you, your web browser of choice, navigate to the login page and login using the credentials provided to you. You're advised to bookmark it.
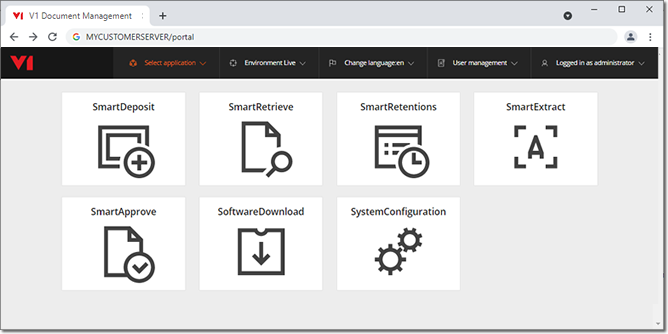
Login to SmartExtract
SmartExtract is the web application used to process incoming documents using AI and OCR.
Once logged in, click the SmartExtract icon to enter the application.
The Summary Screen
This shows a list of documents in each queue, giving high level information about each one. It is the first thing you will see when navigating to SmartExtract.

The screen can show from 10 up to 100 at a time based on the drop down.
You can also search for a document by entering any text in any of the displayed fields.

There are 6 'States' a document can be in and the following chapters will refer to them, as a guide:
| State | Definition |
| Being processed | New documents arriving in to the system that have been extracted as attachments from the email address assigned to this queue. |
| To be checked | Having been processed, they are validated and depending on how accurate the OCR process has been, may or may not required further attention. |
| On hold | Documents put on hold for further query. |
| Failed | Where communication with Sage X3 is compromised, the upload has failed or other server related issue. |
| To be exported | Having been validated and accepted, documents that are actively being imported into Sage X3. |
| Exported | Documents fully processed by SmartExtract and successfully imported into Sage X3. Documents older than 1 month in this area will automatically purged. |
The Image Screen
When you click on a document on the summary screen (or navigate to a link directly), this shows the data extracted on the left and the image on the right.
This is where corrections can be made, validating the content of an image if any warnings / errors appear in the Status message.
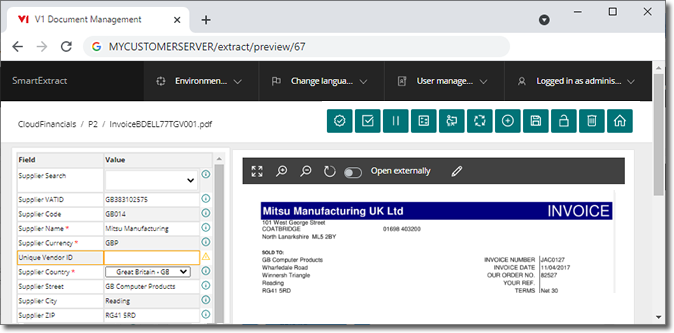
Action Icons

The action icons at the top right of the image screen perform various activities, depending on the status of a document more detail about these is covered in other chapters, but in summary:
From left to right:
Accept
Only made available when all on the document fields are validated OK (or a warning, but this can be bypassed). Clicking Accept will create the document in Sage X3.
Validate
This can be clicked at anytime validating all fields for their content. You are advised to click Validate regularly as you process a document to update fields and their statuses.
Put on Hold
If there's something about the document preventing it from being Exported, putting it 'OnHold' allows it to be reviewed with a reason.
Change Queue
If your document is in the wrong queue and needs to be moved, click the button, select the alternate queue and click Change queue.
Train
Where values that are not Supplier or BU related (such as Supplier Invoice Number) have not been found first time, lasoo the value, click Validate to ensure it's OK and click Train to preserve it's lcoation for subsequent documents.
Reprocess
If the document needs re-processing, click this button to put it back through the OCR process. NOTE: Additional license count will not increase for the same document.
Vendor
If a new Supplier or a Vendor that has yet to be trained you will see a toast message to indicate that. Lasoo the required values to identify the Supplier and BU details from the document, then click the Vendor button to preserve the values for subsequent documents.
Save
Having identified values from a document you want to retain, but not yet fully processed, click the Save button to preserve them.
Un-lock
If another user has had the document open or is currently working on it, it will be locked. Click this button to release the lock to allow it to be processed.
Delete
If a document requires deleting, click this button. You will be asked for a reason, then clicm delete. NOTE: This is a permanent action and cannot be un-done, so use with caution.
Home
Clicking Home returns you to the summary screen of the queue you are in.
Import Documents into SmartExtract
There are a number of ways to import documents into a SmartExtract Queue, you have the following options:
Via an Email
Receiving electronic invoices via email attachments from your suppliers is the primary method by which documents are imported into each of your SmartExtract Queue's.
When SmartMail is configured to poll this and where an email is sent it with an attachment, it will be automatically imported into the associated queue.
Supported attachments include:
• PDF's
• ZIP File containing multiple PDF's (the ZIP file is un-compressed on the fly and all PDF's therein added as individual documents)
• TIF's
From the moment the email is received and it's attachment(s) extracted, the document will appear in the SmartExtract queue within a few moments.
SmartDeposit
A special intermediary table is created in DbArchive called SmartExtract. It will prompt for the email queue ID of the SmartExtract Queue to be imported into. Those images archived into the table are extracted, imported into the associated SmartExtract Queue and where successful, the image purged from DbArchive.
Supported attachments include:
• PDF's
• ZIP File containing multiple PDF's (the ZIP file is un-compressed on the fly and all PDF's therein added as individual documents)
• TIF's
• JPG's
1. Log in to the SmartSuite
2. Select SmartDeposit
3. Select your image (or zip file) from disk
4. Select the SmartExtract table from the dropdown
5. When prompted, select the queue you wish to deposit into from the dropdown
6. Click Deposit document
The document will appear in the SmartExtract queue within a few moments.
DbScanner
The same intermediary DbArchive table each of your SmartExtract Queue's requires an email address assigned. This is the primary way it's identified.
Those images scanned into the table are extracted, imported into the associated SmartExtract Queue and where successful, the image purged from DbArchive.
Supported image types include:
• Single Page B&W tiff
• Multi-Page B&W tiff
• Single Page B&W jpg
• Multi-Page Colour jpg
1. Log in to the DbScanner
2. Select your scan profile
3. When prompted, select the queue you wish to deposit into from the dropdown
4. Click Deposit document
The document will appear in the SmartExtract queue within a few moments.
Search for a Supplier
If a supplier code isn't recognised / found, you can search Sage X3 for it in just a few clicks.
From the Supplier Search drop down, pick which option you want to use to search
- Search on VAT Number
- Select this option, click on the Supplier VATID field and lasoo the VAT number from the document and click Validate.
- Search Name Begins
- Select this option, ensure at least the first letter of the Supplier to find is in the Supplier Name field and click Validate.
- Search Name Contains
- Select this option, ensure one or more letters of the Supplier to find is in the Supplier Name field and click Validate.
Where only one supplier is found, it will be auto populated.
Where more than one result is found, you'll be presented with a dropdown of results, select one and click Validate again to then populate the details.
NOTE: These lookups are from your Sage X3 Endpoint, so if not as expected, must be corrected in Sage X3 to then be processed correctly in SmartExtract.
Reset a Supplier
If you want to change your mind having selected a supplier, or just reset it.
1. From the Supplier Search drop down, where a valid Supplier Code is present, pick the option 'Reset Supplier Code', then click the tick top right (Validate) to validate the selection
2. Your supplier details are cleared and you have the options as present in the above chapter to search again.
Train a Supplier
Automatically
Where the SmartExtractVendorImport Add-On Component has been implemented, all your Supplier and BU information will be automatically imported for you as a background process, so there is no requirement to do any manual identification.
From a Document
1. Identify your supplier (using the above search options) and BU fields.
2. Once done, click the [+] icon top right of the screen, (Vendor) and the Supplier and BU details are added to the database, meaning this and future documents from that Supplier will be automatically recognised from now on.
Manually
1. From the summary screen, click Manage queue
2. Click the pencil next the queue you want to add Supplier information too
3. Click Manage business unit
4. Click Add business unit
5. Enter the details as directed as they would appear on a document from this business unit
6. Click save
7. Click Manage vendors
8. Click Add vendor
9. Again, enter the details as directed as they would appear on a document from this Supplier, including the Business Unit it applies too
10. Click Save
From a File
1. From the summary screen, click Manage queue
2. Click the pencil next the queue you want to add Supplier information too
3. Click Import Vendors
4. Click the link Click here to download sample file!
5. Open the downloaded csv file to see a sample. Where these details can be exported from Sage X3 in CSV format, they can be imported here using the Import data button.
Train a Document
Differing from training a Supplier, if there are values (such as Supplier Invoice Number / Date / Total) that haven't been picked up automatically first time around, they can be trained to do so on subsequent documents from that Supplier.
NOTE: You are advised to do this only when a Supplier has been trained, doing so will often drastically improve recognition of other values.
1. From the image screen, click on the field you wish to extract data too
2. Using your mouse, keeping your finger on it, left click and 'lasoo' a box round the value, when you release it, the data is extracted
3. Repeat this for any / all values to be trained
4. Click the Train icon and the Document is sent to be trained by the system, meaning the values extracted from this and future documents from that Supplier will be automatically recognised from now on.
NOTE: In some cases, it may take one or two images before the values are recognised consistently. This gets better and better the more images the system processes.
Put a Document OnHold
If there's something about the document preventing it from being Exported, putting it 'OnHold' allows it to be reviewed with a reason.
1. From the image screen, click on the [||] icon (Put on Hold)
2. You're prompted for a reason, select one, click Save
3. Your document is moved to the OnHold state with the reason, time / date and user who put it on hold
NOTE: To take a document off hold, click on it from the summary screen and click the play icon, this will return it to the To Be Checked state.
Export a Document into Sage X3
Where a document is OK and fully validated, it can be exported into Sage X3.
NOTE: A document cannot be exported until all fields are validated as OK. Warnings (highlighted yellow) can be bypassed but you will be prompted prior to accepting.
Individually
1. From the image screen, click on the tick icon (Accept)
2. You'll be returned to the summary screen and in a few seconds your document will move from To be exported to Exported.
Multiple Documents at once
1. From the summary screen, tick the box next to those documents youn want to accept at the same time.
2. From the icons on the top right, click the Accept button
2. All those selected will move from To be exported to Exported.
Automatically
A very powerful feature, all SmartExtract queues are monitored out of business hours, where found to be fully validated are exported automatically with no user inverventon required.
Example:
- Customer receives 137 Invoices Tuesday evening, via email, from their U.S supplier(s) at 2am UK time.
- 115 of these Invoices are validated OK, the remaining 22 require further validation.
- At 3am UK time, the queue is monitored and the 115 Invoices validated OK are automatically exported into Sage X3.
- Luke the AP Clerk logs in to SmartExtract on Wednesday morning, logs in to SmartExtract and completes the validation of the remaining 22 Invoices, exporting those into Sage X3.
Delete a Document
If a document has arrived in error, it can be deleted.
NOTE: Use with caution. Once a document has been deleted, it cannot be un-done.
1. From the image screen, click on the dustbin icon (Delete).
2. You're prompted for a reason, enter it, click Delete.
3. Your document will be permanently removed the queue and you're returned to the summary screen.
Upload Type
A new feature for R14, this new field allows flexibility on how and where documents are uploaded.
You have 3 options when the document is accepted during validation:
Create in Sage X3 and Archive
This is the default behaviour, the document will both create the document in Sage X3 and archive the image into EDM.
This is then accessible from either within the Sage X3 interface via the link, or as an external user using SmartRetrieve.
Create in Sage X3 only
If there is no requirement to archive the image in EDM and just create the document in Sage X3.
Archive only
Where the document has been found in Sage X3, but not archived EDM, you can use this option to just attach the image to the existing transaction.
NOTE: This field is tied to the activation of the duplication checking options in Vault.
Contact your administrator to make any changes and consult the Vault Settings section of the Implement PIA with SmartExtract for more information.
Site Code Identifier
This is an important chapter, please read carefully.
SmartExtract captures sufficient information from an inbound Invoice or Credit note (whether from a scan, an on disk PDF or inbound email attachment) in order to create it in Sage X3.
One of the mandatory pieces of information to create a document is the Site Code, along with the supplier details, dates and values.
Akin to Sage X3 itself, you are offered a dropdown if Site Codes to pick from, which when selected and validated, also populate the Invoice Type, based on if the document is an Invoice or Credit Note.
To avoid the need to keep selecting the same one time and again, and given a Site Code is very unlikely to be information that can be extracted from an Invoice, the Site Code Identifier is used to allow the system to remember your selection on subsequent documents..
You have 2 options (depending on which best suits you) on how to use it and how it behaves is tied to the Vault Option OCRSITEIDENT set during implementation.
Option 1
Use a combination of the extracted / imported BU Street | BU Name | Supplier Code
Where the BU Street, BU Name and Supplier Code are valid / have been identified, the Site Code Identifier Field is autopopulated with these values and used to identify the Site.
Option 2
OCR a piece of information off the Document
When a document first comes into the system and the Site Code has yet to be chosen triggering the dropdown to select one, lassoo a meaningful piece of information from the document to identifiy it.
This could be an email address, phone number or Post Code, any piece of text that is consistent for the Site so it can be identified.
How does it work?
When a Site Code Identifier value is extracted for the first, it is committed to a special EDM table called SmartExtract Site Code Identifiers.
The Site Code Identification information and Site Code the document associated with the value is stored.
When subsequent invoices arrive and the value is found, the Site Code is then retrieved and automatically populated without the need to pick from a dropdown.
Can I change it?
Yes. If you have extracted a Site Code Identifier but want to change it, enter a . in the field and click Validate.
The previous selection is cleared from the SmartExtract Site Code Identifier EDM table allowing you to re-identify a new value.
Can I update it?
Yes. If you have already extracted a Site Code Identifier but want to update it to a new one, lassoo a different value / identify a different BU / Supplier details and click Validate to confirm the selection.
The previous one is preserved and the new one added. You can have as many combinatons as you like, the more you have in some cases, the better it will be at recognising it in the future.
Do I have to use it?
No. If a Purchase Order or Receipt is identified, the Site Code is taken from that, in which case you don't have to use it at all. It is only required for NONPOP Invoices / Credit Notes.
It can also be de-activated completely, but be aware, this will mean you will have to visit every single document to set the Site Code, this is not advised as it will compromise the automation benefits of the solution.
Annotations
Annotations (the equivalent of a sticky note) can be added to documents, allowing notes about them to be read / visible on screen.
To add an annotation
1. From the image screen, click on the pencil icon (just above the image).
2. You're prompted for a Note, enter it, click OK.
3. The view annotations icon will then glow yellow to indicate at least one annotation is present.
To view an annotation
1. As above, where at least one annotation is present, click the icon to see all annotations for that document in a list.
NOTE: If no annotations are present on a document, you will not see the icon.
Create a Queue
A Queue in SmartExtract is where documents are processed. New queues can be created at any time wth 3 simple steps, they must be named the same as the Sage X3 Endpoint to which they relate.
NOTE: At least one fully functional queue needs to be present.
Step 1 - Create the Queue
1. From the summary screen, click on Manage queue.
2. Click on Add queue
3. Give your queue the name of the Endpoint as it is displayed in Sage X3
4. Select the Category SageX3
5. Give your queue an email address. Documents sent to that address will automatically be imported into it.
6. Ensure Line item extraction is set to the on position
7. Click the Save button
8. Click the Export button next to one of your existing queues, this will download a .json file matching it's internal queue name
9. Click the Import button next to the one you've just created and where prompted, browse to / select the .json file downloaded
10. Click Import data to clone the fields in your new queue
You new queue is now created.
Step 2 - Assign Permissions
1. From the summary screen, click on User management > Manage Roles
2. Click the pencil icon next to the role who's users within it wish to have access to the new queue
3. Scroll down untl you see the Sage X3 category and click the down arrow to see the queues
4. Tick the box on the right to give this role access to the queue, click Save
Your permissions are now set.
Step 3 - Implement your email address
Usually performed by an administrative user as it requires direct access to the V1 Server.
Consult the chapter Configure V1SmartMail for receiving emails in the Implement PIA with SmartExtract section.
This then completes the procedure to add a new queue.